Destination: To be able to use Git to systematically record the history of a folder in your own computer. More specifically, to use Git to save a snapshot of the folder at specific points of time.
Motivation: Recoding the history of files in a folder (e.g, code files of a software project, case notes, files related to an article/book that you are authoring) can be useful in case you need to refer to past versions.
Lesson plan:
→ Lesson: Introduction to Revision Control covers that part.
→ Lesson: Preparing to Use Git covers that part.
→ Lesson: Putting a Folder Under Git's Control covers that part.
→ Lesson: Specifying What to include in a Snapshot covers that part.
→ Lesson: Saving a Snapshot covers that part.
To be able to save snapshots of a folder using Git, you must first put the folder under Git's control by initialising a Git repository in that folder.
Normally, we use Git to manage a revision history of a specific folder, which gives us the ability to revision-control any file in that folder and its subfolders.
To put a folder under the control of Git, we initialise a repository (short name: repo) in that folder. This way, we can initialise repos in different folders, to version-control different clusters of files independently of each other e.g., files belonging to different projects.
You can follow the hands-on practical below to learn how to initialise a repo in a folder.
What is this? HANDS-ON panels contain hands-on activities you can do as you learn Git.
1 First, choose a folder. The folder may or may not have any files in it already. For this practical, let us create a folder named things for this purpose.
cd my-projects
mkdir things
2 Then CD into it.
cd things
3 Run the git status command to check the status of the folder.
git status
fatal: not a git repository (or any of the parent directories): .git
Don't panic. The error message is expected. It confirms that the folder currently does not have a Git repo.
4 Now, initialise a repository in that folder.
Use the command git init which should initialise the repo.
git init
Initialized empty Git repository in things/.git/
The output might also contain a hint about a name for an initial branch (e.g., hint: Using 'master' as the name for the initial branch ...). You can ignore that for now.
Note how the output mentions the repo being created in things/.git/ (not things/). More on that later.
Windows: Click
File→Clone/New…→ Click on+ Createbutton on the top menu bar.
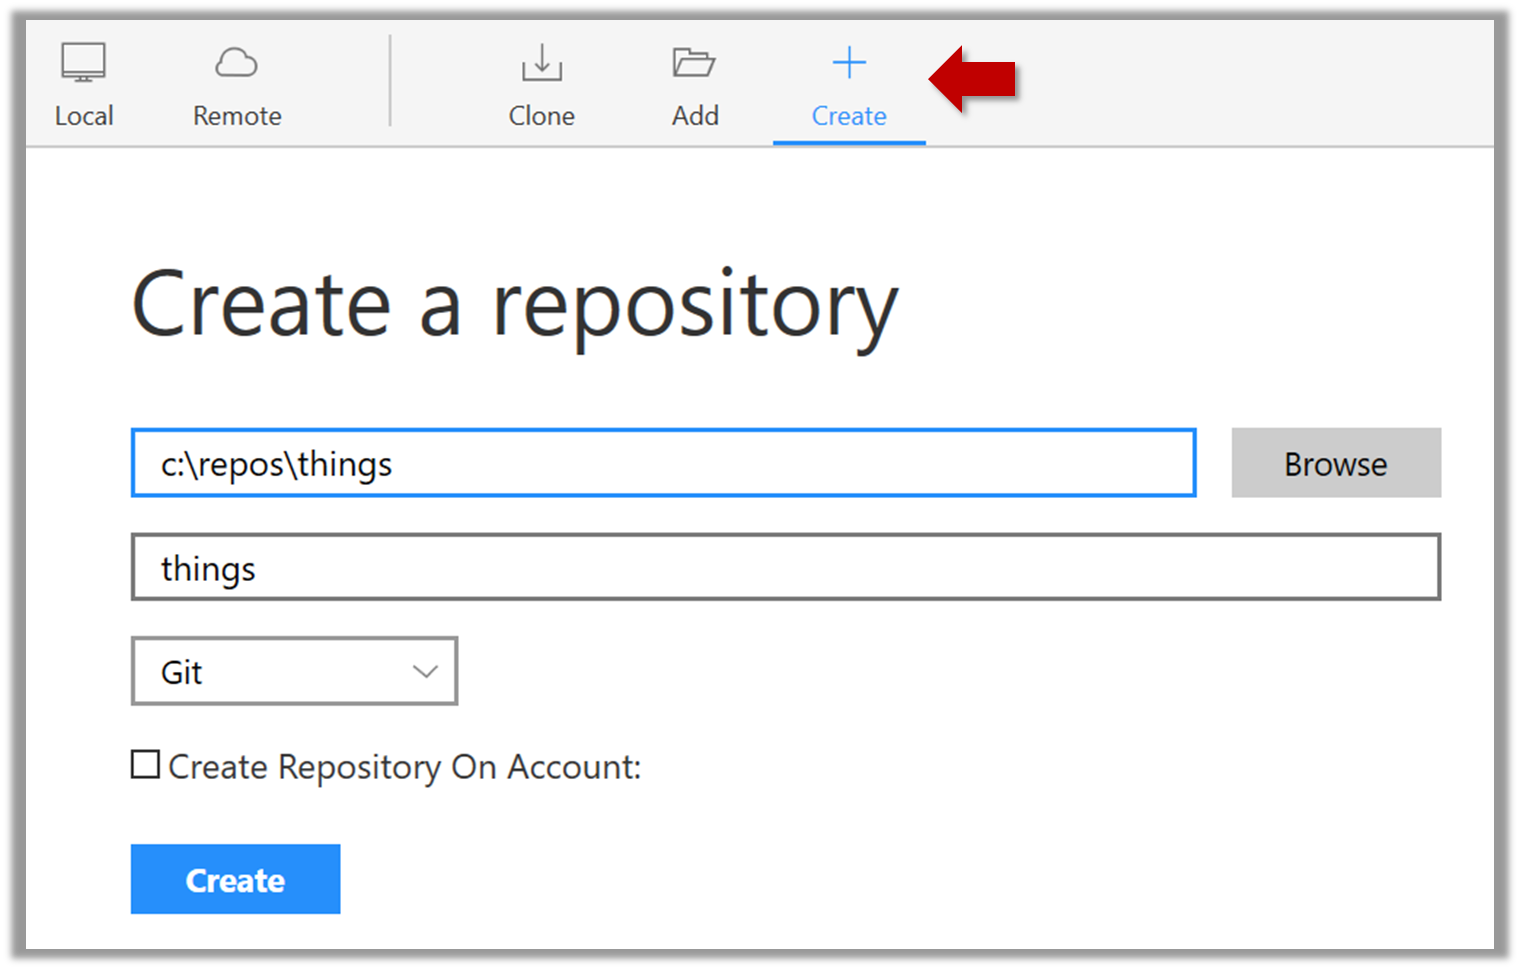
Enter the location of the directory and clickCreate.Mac:
New...→Create Local Repository(orCreate New Repository) → Click...button to select the folder location for the repository → click theCreatebutton.
Initialising a repo results in two things:
- First, Git now recognises this folder as a Git repository, which means it can now help you track the version history of files inside this folder.
To confirm, you can run the git status command. It should respond with something like the following:
git status
On branch master
No commits yet
nothing to commit (create/copy files and use "git add" to track)
Don't worry if you don't understand the output (we will learn about them later); what matters is that it no longer gives an error message as it did before.
- Second, Git created a hidden subfolder named
.gitinside thethingsfolder. This folder will be used by Git to store meta-data about this repository.
What is this? UNDER-THE-HOOD panels explain how a certain Git feature works under the hood i.e., some implementation details.
They can be skipped the first time you are taking a tour. But we recommend that you delve into some of them at some point. Reason: While Git can be used without knowing much about its internal workings, knowing those details will allow you to be more confident when using Git, and harness more of its awesome power.
A Git-controlled folder is divided into two main parts:
- The repository – stored in the hidden
.gitsubfolder, which contains all the metadata and history. - The working directory – everything else in that folder, where you create and edit files.
What is this? EXERCISE panels contain a Git-Mastery exercise that you can download using the Git-Mastery app, and you can use the same app to verify that your solution is correct.
What is this? DETOUR panels contain related directions you can optionally explore. We recommend that you only skim them the first time you are going through a tour (i.e., just to know what each detour covers); you can revisit them later, to deepen your knowledge further, or when you encounter a use case related to the concepts covered by the detour.
To save a snapshot, you start by specifying what to include in it, also called staging.
Git considers new files that you add to the working directory as 'untracked' i.e., Git is aware of them, but they are not yet under Git's control. The same applies to files that existed in the working folder at the time you initialised the repo.
A Git repo has an internal space called the staging area which it uses to build the next snapshot. Another name for the staging area is the index).
We can stage) an untracked file to tell Git that we want its current version to be included in the next snapshot. Once you stage an untracked file, it becomes 'tracked' (i.e., under Git's control).
In the example below, you can see how staging files change the status of the repo as you from (a) to (c).
staging area
[empty]
other meta data ...
├─ fruits.txt (untracked!)
└─ colours.txt (untracked!)
(a) State of the repo, just after initialisation, and creating two files. Both are untracked.
staging area
└─ fruits.txt
other meta data ...
├─ fruits.txt (tracked)
└─ colours.txt (untracked!)
(b) State after staging
fruits.txt.staging area
├─ fruits.txt
└─ colours.txt
other meta data ...
├─ fruits.txt (tracked)
└─ colours.txt (tracked)
(c) State after staging
colours.txt.1 First, add a file (e.g., fruits.txt) to the things folder.
Here is an easy way to do that with a single terminal command.
echo "apples\nbananas\ncherries\n" > fruits.txt
apples
bananas
cherries
2 Stage the new file.
2.1 Check the status of the folder using the git status command.
git status
On branch master
No commits yet
Untracked files:
(use "git add <file>..." to include in what will be committed)
fruits.txt
nothing added to commit but untracked files present (use "git add" to track)
2.2 Use the add command stage the file.
git add fruits.txt
You can replace the add with stage (e.g., git stage fruits.txt) and the result is the same (they are synonyms).
2.3 Check the status again. You can see the file is no longer 'untracked'.
git status
On branch master
No commits yet
Changes to be committed:
(use "git rm --cached <file>..." to unstage)
new file: fruits.txt
As before, don't worry if you don't understand the content of the output (we'll unpack it in a later lesson). The point to note is that the file is no longer listed as 'untracked'.
2.1 Note how the file is shown as ‘unstaged’. The question mark icon indicates the file is untracked.
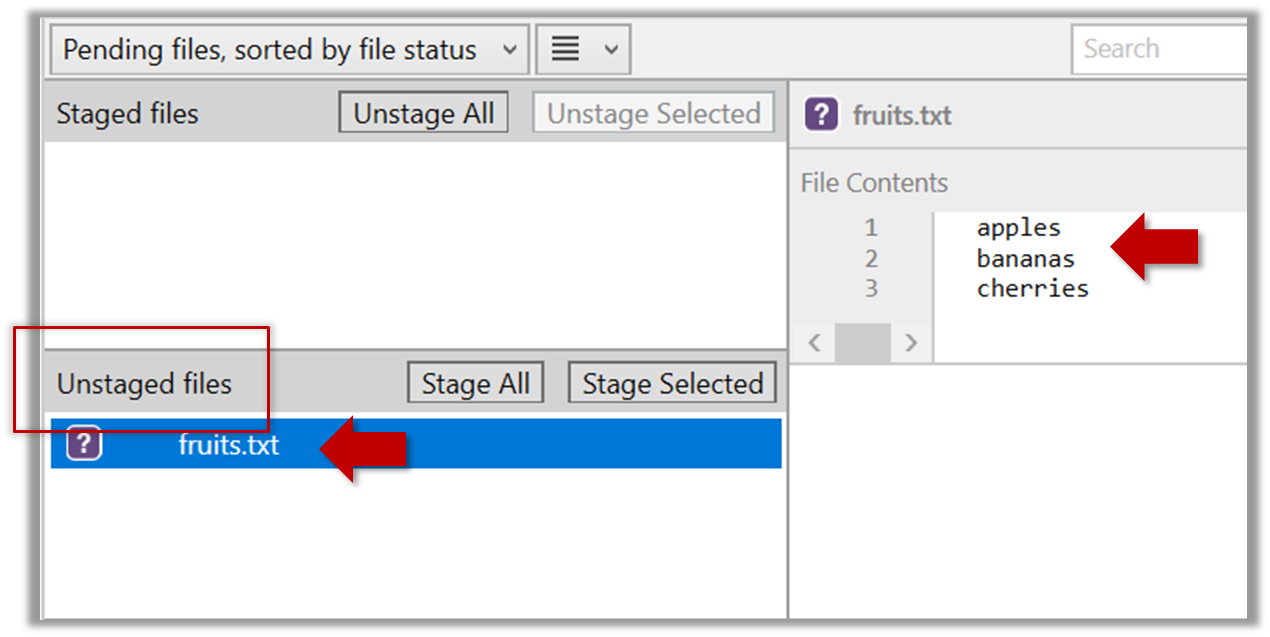
If the newly-added file does not show up in Sourcetree UI, refresh the UI (: F5
| ⌥+R)
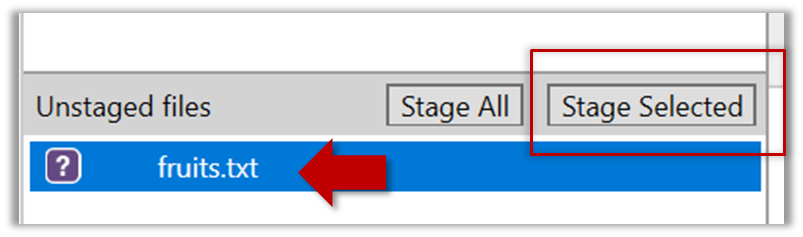
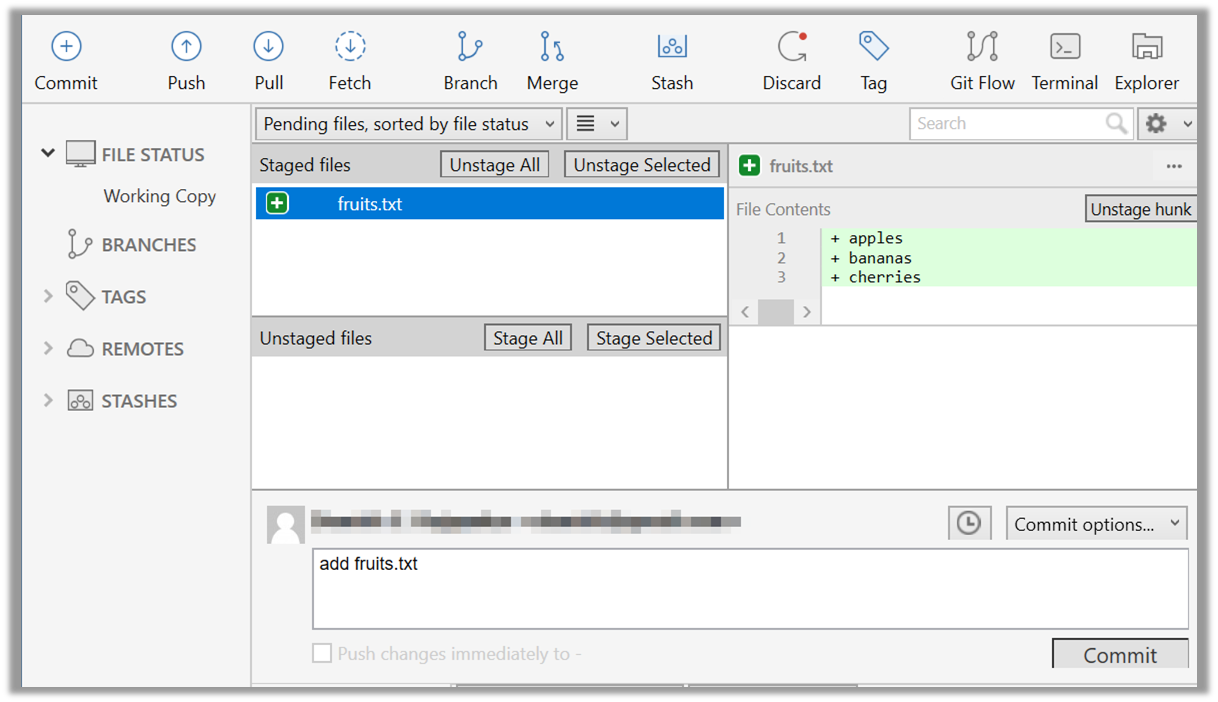
2.2 Stage the file by selecting the fruits.txt and clicking on the Stage Selected button.
2.3 Note how the file is staged now i.e., fruits.txt appears in the Staged files panel now.
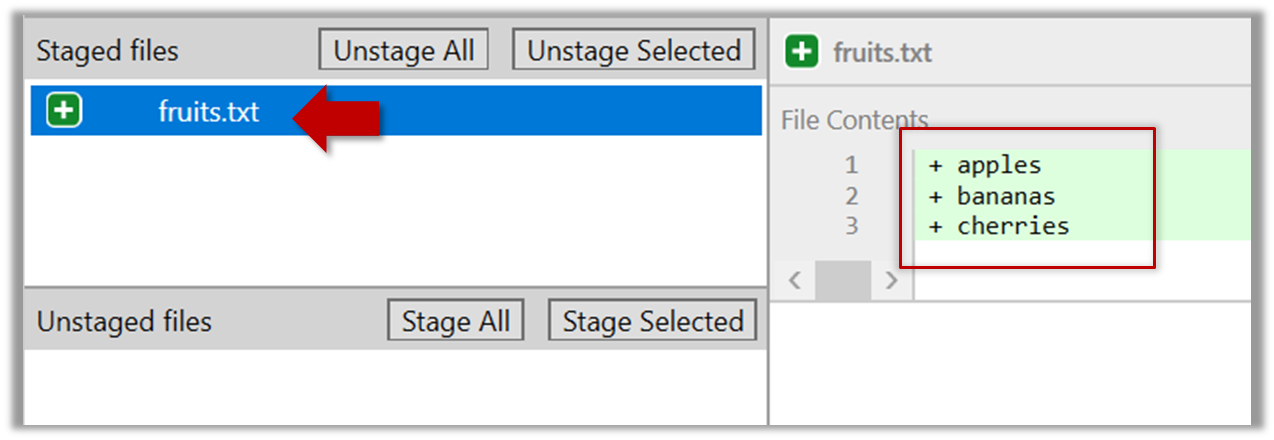
If Sourcetree shows a \ No newline at the end of the file message below the staged lines (i.e., below the cherries line in the above screenshot), that is because you did not hit enter after entering the last line of the file (hence, Git is not sure if that line is complete). To rectify, move the cursor to the end of the last line in that file and hit enter (like you are adding a blank line below it). This new change will now appear as an 'unstaged' change. Stage it as well.
If you modify a staged file, it goes into the 'modified' state i.e., the file contains modifications that are not present in the copy that is waiting (in the staging area) to be included in the next snapshot. If you wish to include these new changes in the next snapshot, you need to stage the file again, which will overwrite the copy of the file that was previously in the staging area.
The example below shows how the status of a file changes when it is modified after it was staged.
staging area
Alice
other meta data ...
Alice
(a) The file names.txt is staged. The copy in the staging area is an exact match to the one in the working directory.
staging area
Alice
other meta data ...
Alice
Bob
(b) State after adding a line to the file. Git indicates it as 'modified' because it now differs from the version in the staged area.
staging area
Alice
Bob
other meta data ...
Alice
Bob
(c) After staging the file again, the staging area is updated with the latest copy of the file, and it is no longer marked as 'modified'.
1 First, add another line to fruits.txt, to make it 'modified'.
Here is a way to do that with a single terminal command.
echo "dragon fruits" >> fruits.txt
apples
bananas
cherries
dragon fruits
2 Now, verify that Git sees that file as 'modified'.
Use the git status command to check the status of the working directory.
$ git status
On branch master
No commits yet
Changes to be committed:
(use "git rm --cached <file>..." to unstage)
new file: fruits.txt
Changes not staged for commit:
(use "git add <file>..." to update what will be committed)
(use "git restore <file>..." to discard changes in working directory)
modified: fruits.txt
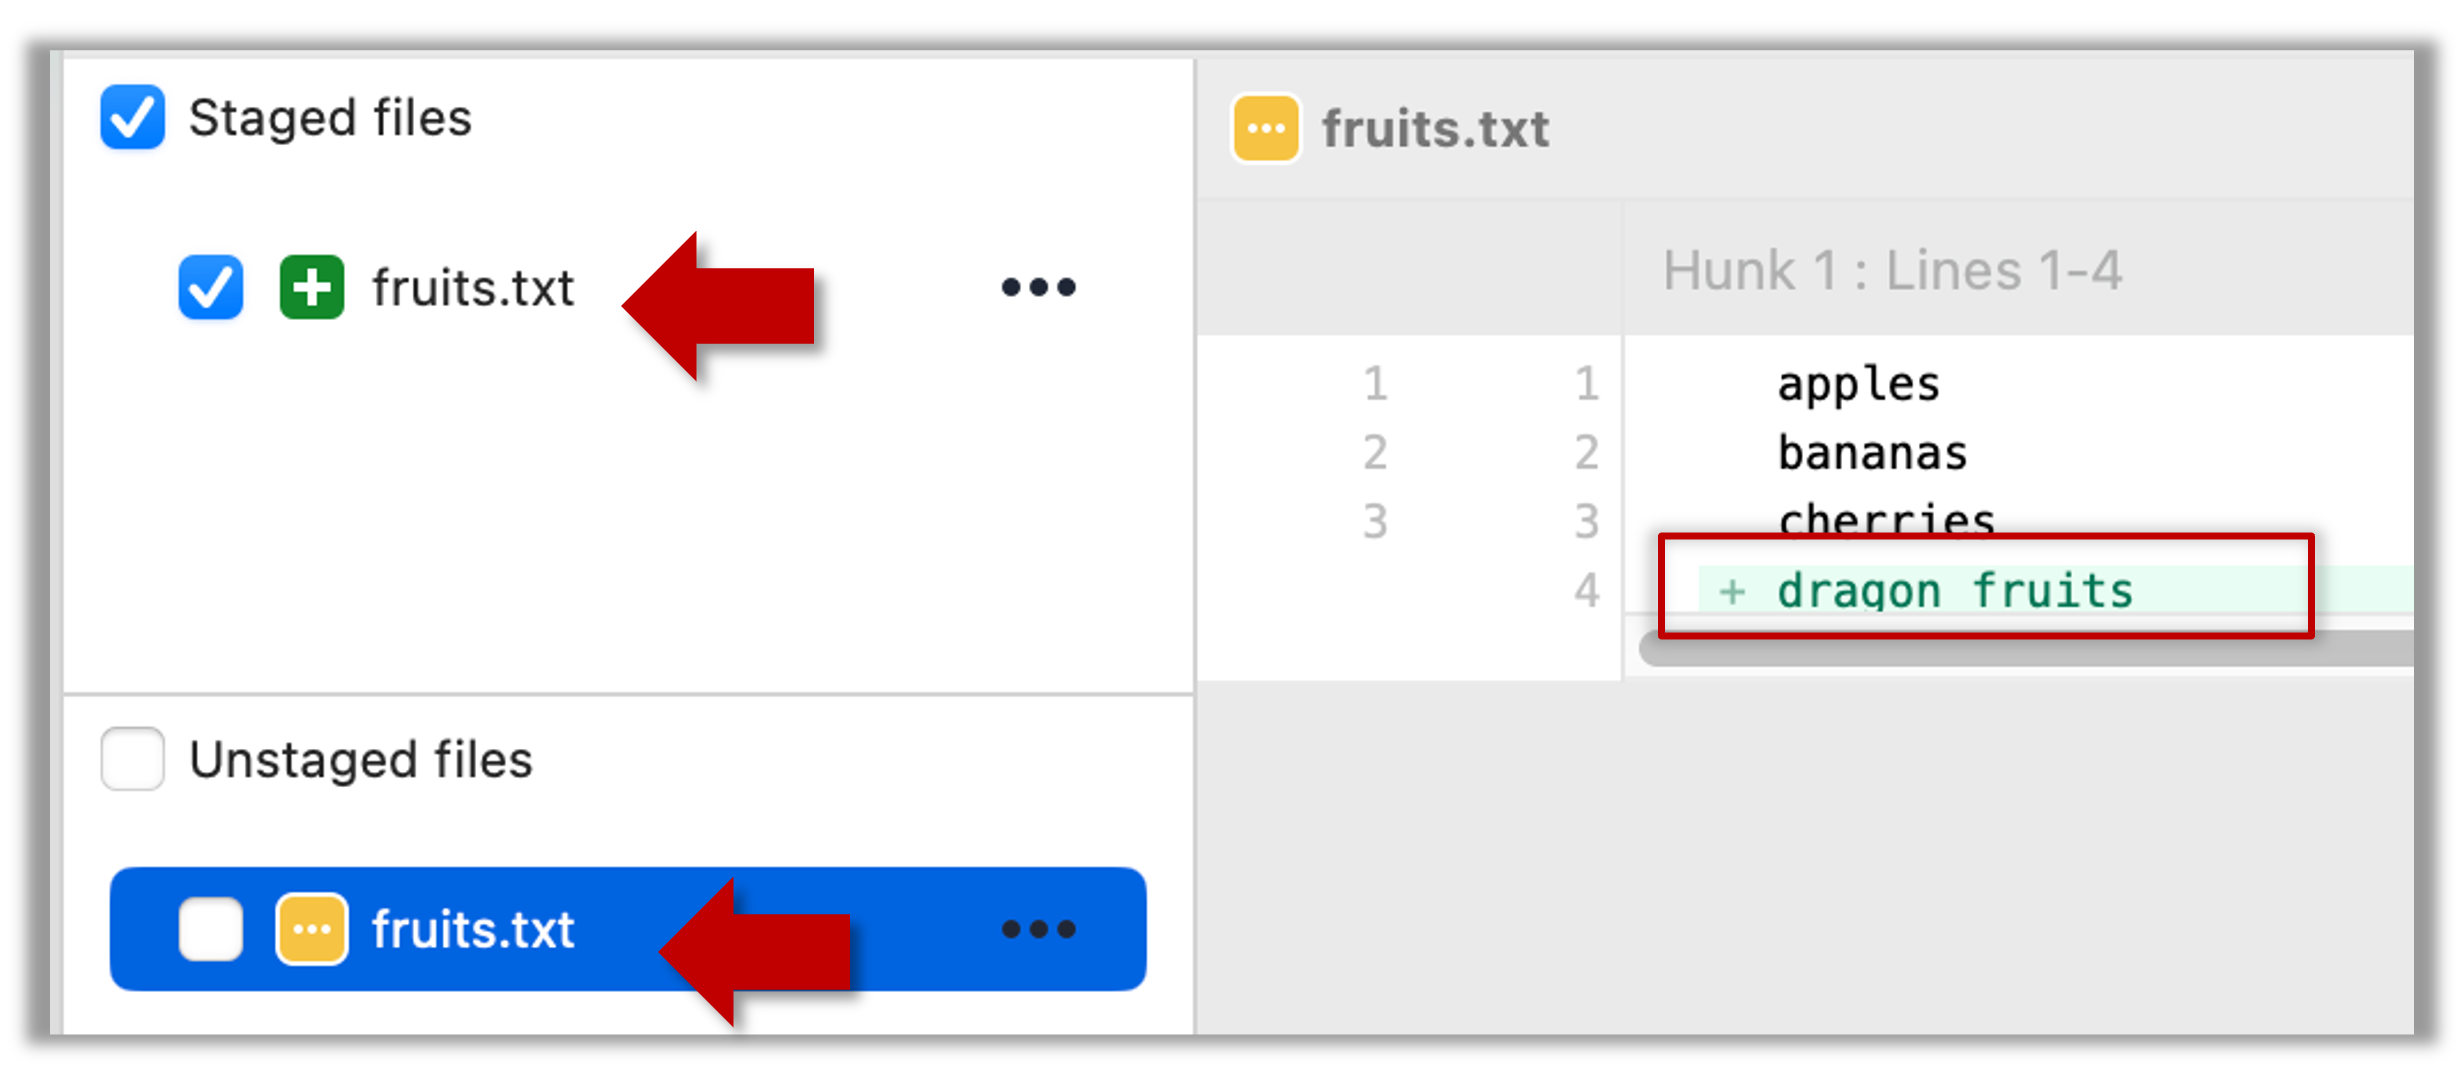
Note how fruits.txt now appears twice, once as new file: ... (representing the version of the file we staged earlier, which had only three lines) and once as modified: ... (representing the latest version of the file which now has a fourth line).
Note how fruits.txt appears in the Staged files panel as well as 'Unstaged files'.
3 Stage the file again, the same way you added/staged it earlier.
4 Verify that Git no longer sees it as 'modified', similar to step 2.
Git does not track empty folders. You can test this by adding an empty subfolder inside the things folder (e.g., things/more-things and checking if it shows up as 'untracked' (it will not). If you add a file to that folder (e.g., things/more-things/food.txt) and then staged that file (e.g., git add more-things/food.txt), the folder will now be included in the next snapshot.
after staging, you can now proceed to save the snapshot, aka creating a commit.
Saving a snapshot is called committing and a saved snapshot is called a commit.
A git commit is a snapshot of your project based on the files you have staged, more precisely, a record of the exact state of all files in the staging area (index) at that moment -- even the files that have not changed since the last commit. Consequently, a commit has all the information it needs to recreate the tracked files in the working folder at the time the commit was created.
A commit also includes metadata such as the author, date, and an optional commit message describing the change.
A Git commit is a snapshot of all tracked files, not simply a delta of what changed since last commit.
Assuming you have previously staged changes to the fruits.txt, go ahead and create a commit.
1 First, let us do a sanity check using the git status command.
git status
On branch master
No commits yet
Changes to be committed:
(use "git rm --cached <file>..." to unstage)
new file: fruits.txt
2 Now, create a commit using the commit command. The -m switch is used to specify the commit message.
git commit -m "Add fruits.txt"
[master (root-commit) d5f91de] Add fruits.txt
1 file changed, 5 insertions(+)
create mode 100644 fruits.txt
3 Verify the staging area is empty using the git status command again.
git status
On branch master
nothing to commit, working tree clean
Note how the output says nothing to commit which means the staging area is now empty.
Click the Commit button, enter a commit message (e.g. add fruits.txt) into the text box, and click Commit.
Git commits form a timeline, as each corresponds to a point in time when you asked Git to take a snapshot of your working directory. Each commit links to at least one previous commit, forming a structure that we can traverse.
A timeline of commits is called a branch. By default, Git names the initial branch master -- though many now use main instead. You'll learn more about branches in future lessons. For now, just be aware that the commits you create in a new repo will be on a branch called master (or main) by default.
gitGraph
    %%{init: { 'theme': 'default', 'gitGraph': {'mainBranchName': 'master (or main)'}} }%%
    commit id: "Add fruits.txt"
    commit id: "Update fruits.txt"
    commit id: "Add colours.txt"
    commit id: "..."
Git can show you the list of commits in the Git history.
1 View the list of commits, which should show just the one commit you created just now.
You can use the git log command to see the commit history.
git log
commit d5f91de... (HEAD -> master)
Author: ... <...@...>
Date: ...
Add fruits.txt
Use the Q key to exit the output screen of the git log command.
Note how the output has some details about the commit you just created. You can ignore most of it for now, but notice it also shows the commit message you provided.
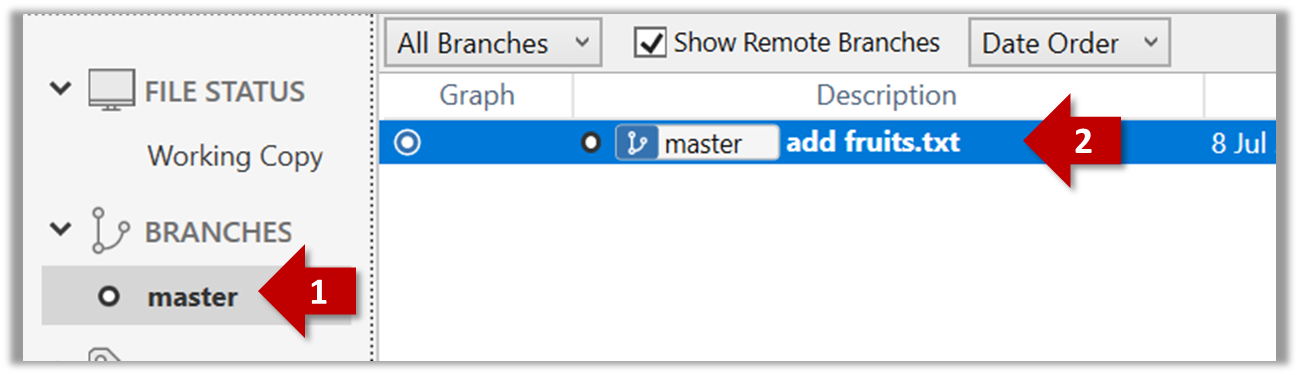
Expand the BRANCHES menu and click on the master to view the history graph, which contains only one node at the moment, representing the commit you just added. For now, ignore the label master attached to the commit.
2 Create a few more commits (i.e., a few rounds of add/edit files -> stage -> commit), and observe how the list of commits grows.
Here is a example list of bash commands to add two commits while observing the list of commits
$ echo "figs" >> fruits.txt # add another line to fruits.txt
$ git add fruits.txt # stage the updated file
$ git commit -m "Insert figs into fruits.txt" # commit the changes
$ git log # check commits list
$ echo "a file for colours" >> colours.txt # add a colours.txt file
$ echo "a file for shapes" >> shapes.txt # add a shapes.txt file
$ git add colours.txt shapes.txt # stage both files in one go
$ git commit -m "Add colours.txt, shapes.txt" # commit the changes
$ git log # check commits list
The output of the final git log should be something like this:
commit 18300... (HEAD -> master)
Author: ... <...@...>
Date: ...
Add colours.txt, shapes.txt
commit 2beda...
Author: ... <...@...>
Date: ...
Insert figs into fruits.txt
commit d5f91...
Author: ... <...@...>
Date: ...
Add colours.txt, shapes.txt
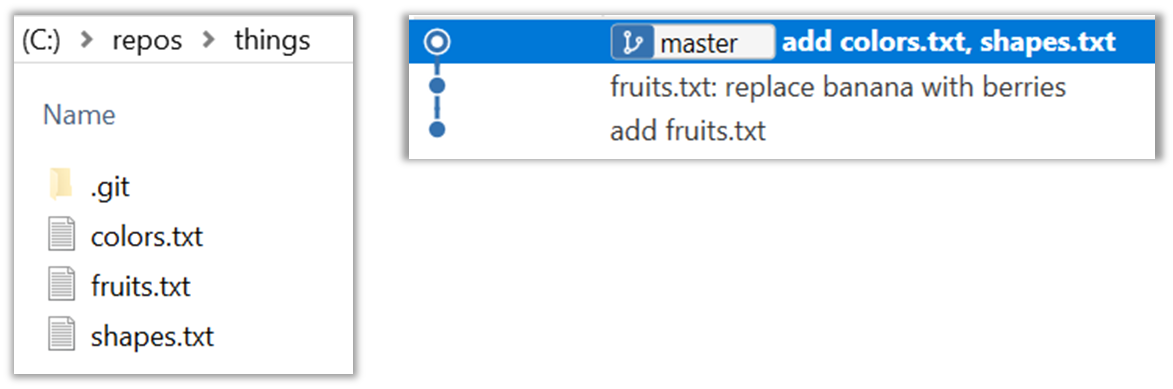
To see the list of commits, click on the History item (listed under the WORKSPACE section) on the menu on the right edge of Sourcetree.
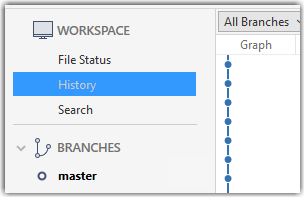
After adding two more commits, the list of commits should look something like this:
What you learned: You should now be able to initialise a Git repository in a folder and commit snapshots of its files at times of your choice. So far, you did not learn how to actually make use of those snapshots (other than to show a list of them) -- we will do that in later tours.
What's next: Tour 2: Backing up a Repo on the Cloud