Destination: ...
Motivation: ...
Lesson plan:
→ Lesson: Duplicating a Remote Repo on the Cloud covers that part.
→ Lesson: Creating a Copy of a Repo covers that part.
→ Lesson: Downloading Data Into a Local Repo covers that part.
→ Lesson: Pushing Tags to a Remote Repo covers that part.
...
Given below is a scenario you can try in order to learn how to fork a repo:.
0. Create a GitHub account if you don't have one yet.
1. Go to the GitHub repo you want to fork e.g., samplerepo-things
2. Click on the  button on the top-right corner. In the next step,
- choose to fork to your own account or to another GitHub organization that you are an admin of.
- Un-tick the
[ ] Copy the master branch onlyoption, so that you get copies of other branches (if any) in the repo.
As you might have guessed from the above, forking is not a Git feature, but a feature provided by remote Git hosting services such as Github.
GitHub does not allow you to fork the same repo more than once to the same destination. If you want to re-fork, you need to delete the previous fork.
...
Here's a scenario you can try in order to learn how to pull commits from another repo to yours.
1. Clone a repo (e.g., the repo used in [Git & GitHub → Clone]) to be used for this activity.
2. Delete the last few commits to simulate cloning the repo a few commits ago.
Use the reset command to delete commits at the tip of the revision history.
$ git reset --hard HEAD~2
More info on the git reset command can be found here.
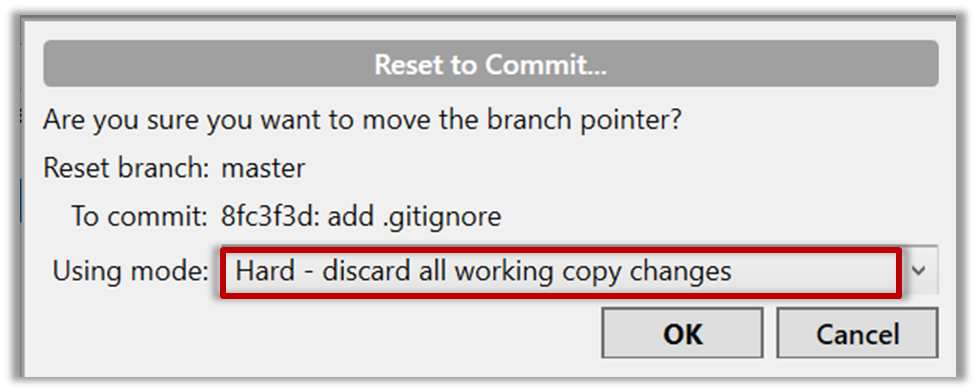
Right-click the target commit (i.e. the commit that is 2 commits behind the tip) and choose Reset current branch to this commit.

Choose the Hard - … option and click OK.
This is what you will see.
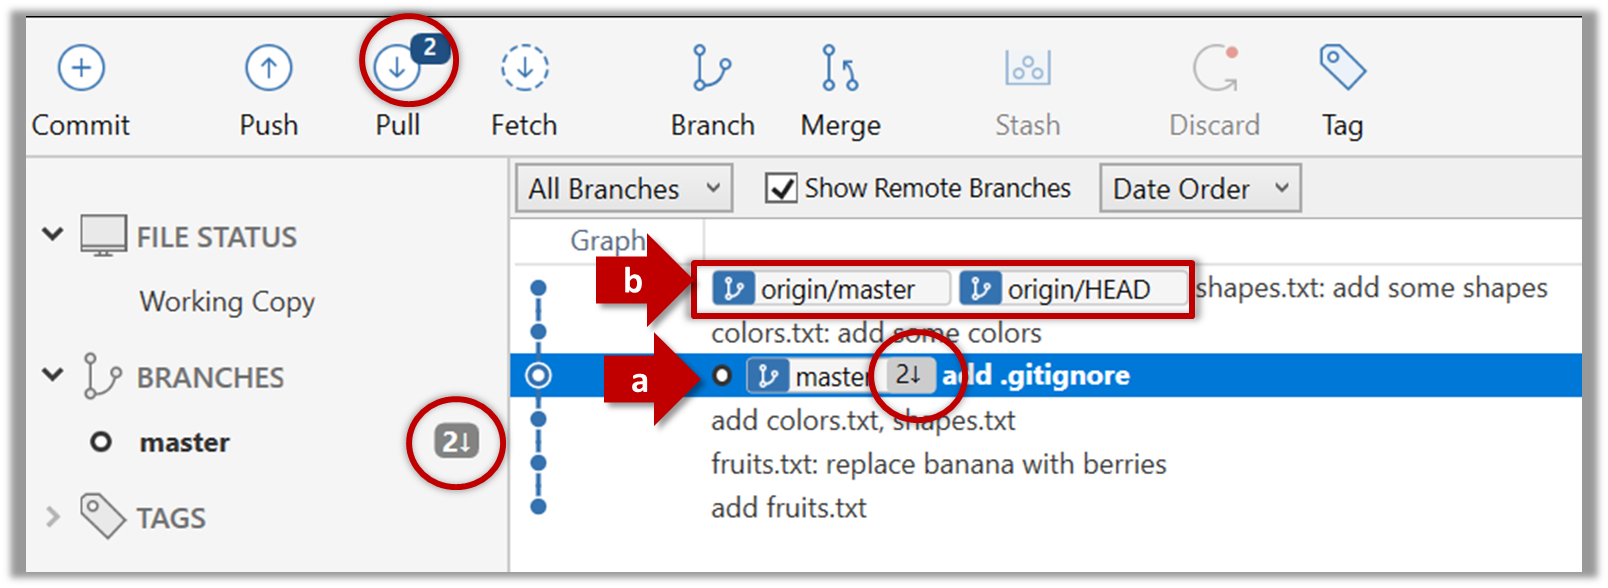
Note the following (cross-refer the screenshot above):
- Arrow marked as
a: The local repo is now at this commit, marked by themasterlabel. - Arrow marked as
b: Theorigin/masterlabel shows what is the latest commit in themasterbranch in the remote repo.originis the default name given to the upstream repo you cloned from. You can ignore theorigin/HEADlabel for now.
Now, your local repo state is exactly how it would be if you had cloned the repo 2 commits ago, as if somebody has added two more commits to the remote repo since you cloned it.
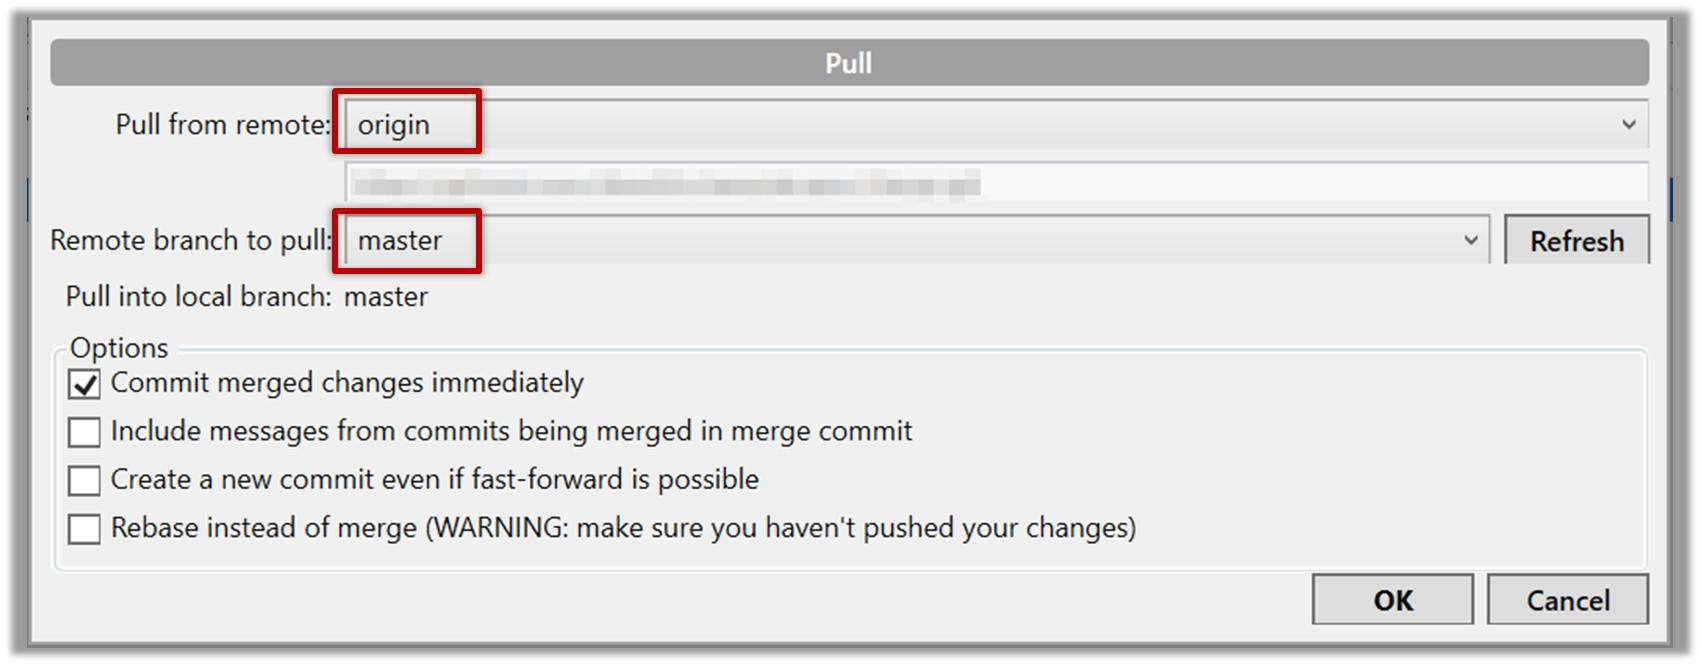
3. Pull from the remote repo: To get those missing commits to your local repo (i.e. to sync your local repo with upstream repo) you can do a pull.
$ git pull origin
Click the Pull button in the main menu, choose origin and master in the next dialog, and click OK.
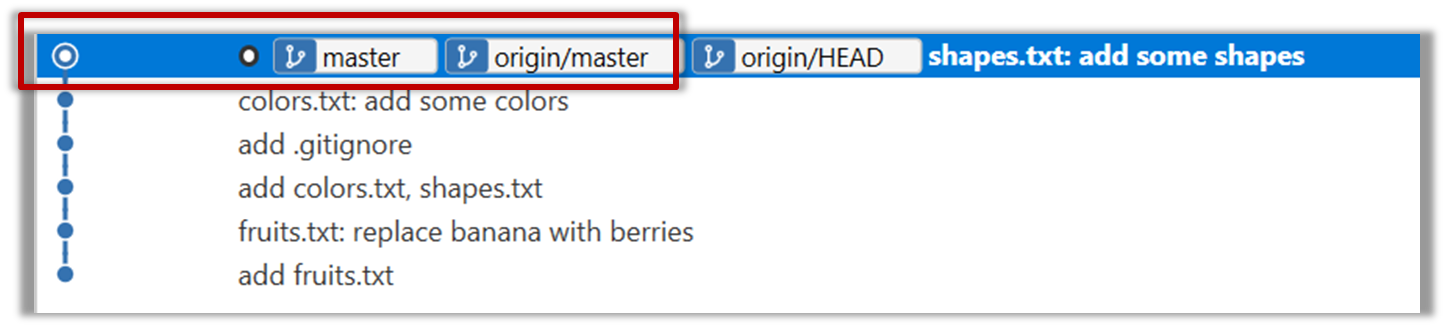
Now you should see something like this where master and origin/master are both pointing the same commit.
Now, you can fetch or pull (pulling will fetch the branch and merge the new code to the current branch) from the added repo as you did before but choose the remote name of the repo you want to pull from (instead of origin):
Click the Fetch button or the Pull button first.
If the Remote branch to pull dropdown is empty, click the Refresh button on its right.
You can also do a fetch instead of a pull in which case the new commits will be downloaded to your repo but the working directory will remain at the current commit. To move the current state to the latest commit that was downloaded, you need to do a merge. A pull is a shortcut that does both those steps in one go.
...
5. Add a few more commits, and tag some of them.
6. Push the new commits and the tags.
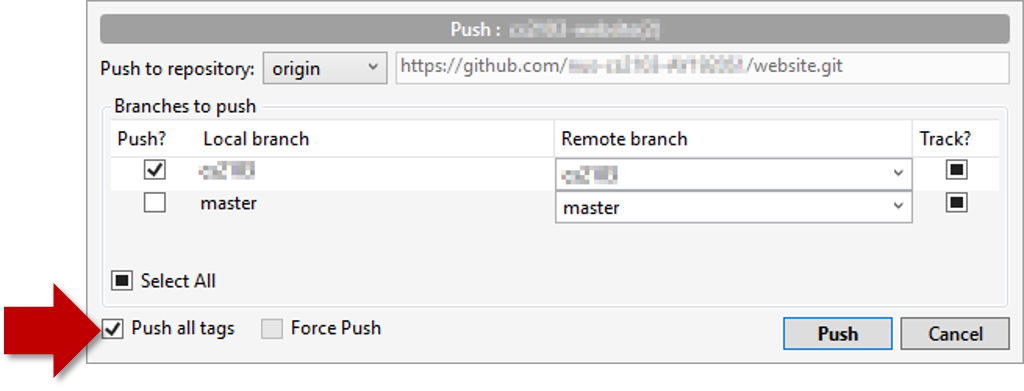
A normal push does not include tags. After pushing the commits (as before), push tags to the repo as well:
To push a specific tag:
$ git push origin v1.0b
To push all tags:
$ git push origin --tags
Push similar to before, but ensure the [ ] Push all tags option in the push dialog is ticked as well.
What you learned: ...
What's next: coming soon ...